Some people look great in every photo. Others dread being in front of a camera and are consistently disappointed by the results. The difference between the two groups is almost never about how they look in person. It is about understanding a handful of principles that the camera-confident apply instinctively and everyone else has never been taught.
How to Look Good in Photos
The Complete Guide to looking good in any photo
This guide covers all of it: why most people look worse in photos than in real life, how lighting works and how to use it, posing and angles that flatter, how to produce a natural expression on demand, what to wear, and how AI tools can fix the things that go wrong even when everything else goes right.
No photography experience required. Most of this you can apply in the next five minutes.
The camera does not lie. But it does have a very specific set of preferences, and once you know what they are, you can work with them every time.
Why Most People Look Worse in Photos Than in Real Life
Before getting into the fixes, it helps to understand why the problem exists. Most people assume they simply are not photogenic, as if it were a fixed trait. It is not. The reasons most people look worse in photos than in real life are specific and addressable.
- The camera lens distorts at close range. A standard smartphone camera, particularly the front-facing one, introduces distortion at short distances that makes features appear larger or wider than they are. This is a lens physics issue, not a you issue. Shooting from slightly further away with the rear camera and zooming in slightly produces more accurate, flattering results.
- You are seeing your mirror image in reverse. Most people are accustomed to seeing their reflection in a mirror, which is the opposite of what a camera captures. Seeing yourself from the other side can feel subtly wrong even when the photo is accurate. This is why many people dislike photos of themselves that others find perfectly good.
- Still images capture expressions mid-transition. In real life your face is constantly moving and your expressions are read in context and sequence. A camera captures a single moment, which can easily be mid-blink, mid-chew, or in the brief awkward transition between one expression and another.
- Unflattering lighting. The most common reason for a bad photo. More on this below.
- An unflattering angle. The second most common reason. Also covered below.
Lighting: The Single Most Important Variable
If you take one thing from this guide, take this: lighting matters more than anything else. More than your pose, your outfit, your makeup, or how you feel about the photo. A great photo in bad lighting looks worse than a mediocre photo in great lighting. Every time.
Use soft, indirect natural light
The best light for almost any photo is indirect natural light from a large source. Stand facing a large window on an overcast day, or when the sun is not directly hitting the window, and the light will be soft, even, and flattering. This is what professional studio lighting is designed to replicate. It is available for free, everywhere, every day. The key word is indirect. Direct sunlight creates harsh shadows that unflatten almost every face.
Face toward the light source
Position yourself so the light is in front of you rather than behind or to the side. Light behind you (backlighting) puts your face in shadow and creates a silhouette effect. Light from directly to the side creates dramatic half-shadow that works for editorial photography but not for most photos. Light from in front, slightly above, is the most universally flattering position.
Avoid overhead lighting
Overhead lighting, whether from ceiling lights, direct sun at midday, or fluorescent office lighting, casts shadows downward that make eyes appear sunken, create unflattering shadows under the nose and chin, and generally produce the least flattering possible result. If you are in overhead lighting and need to take a photo, hold your phone slightly above eye level and angle your face upward toward the light source rather than down.
Be careful with artificial light
Indoor artificial lighting varies enormously in quality and colour temperature. Warm, soft lamp light can be flattering. Cool, bright overhead fluorescent light almost never is. If you are indoors without access to natural light, position yourself near a lamp placed at face level rather than relying on overhead room lighting. Ring lights, now widely available at low cost, provide consistent flattering frontal light that is why they became a fixture in creator setups.
Angles: How to Position Yourself and the Camera
After lighting, the angle between you and the camera is the variable with the most impact on how flattering a photo is. A few adjustments make a significant difference.
Keep the camera at eye level or slightly above
This is the most important angle rule. A camera positioned below eye level shoots up at the face, emphasising the chin and jaw in a way that is unflattering for most people. A camera at eye level produces the most natural, accurate result. A camera slightly above eye level is the most universally flattering position, producing a slight elongation of the face and a natural downward tilt of the eyes. Never hold your phone below your chin for a selfie.
Turn your body slightly
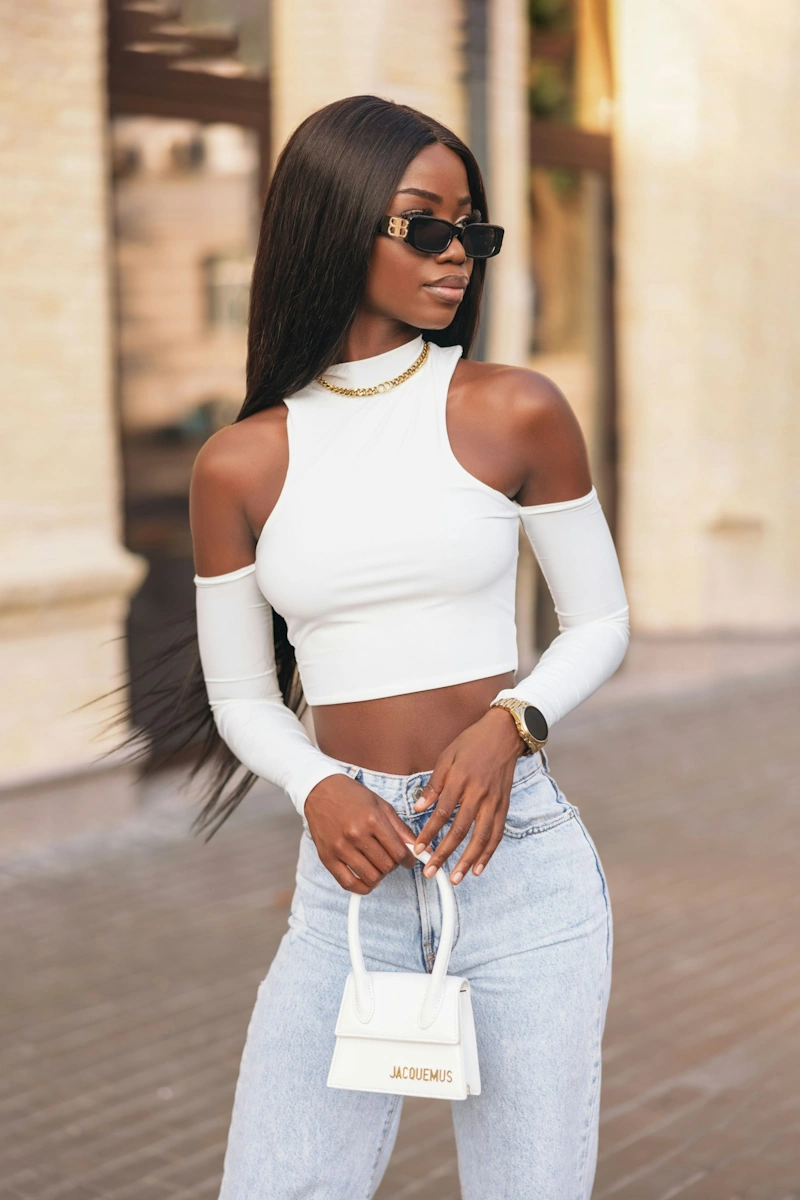
Standing square-on to the camera creates the widest possible silhouette. Turning your body to approximately 45 degrees from the camera, while keeping your face toward it, creates a more dynamic and naturally slimming result. This works for full-body and half-body shots. For headshots and close portraits, a slight angle of the head rather than the body produces the same softening effect.
The chin push
This sounds counterintuitive but works consistently: push your chin slightly forward and down toward the camera rather than pulling it back. Pulling the chin back creates the appearance of a double chin by compressing the soft tissue under the jaw. Pushing it slightly forward and down elongates the neck, defines the jawline, and produces a noticeably more flattering result. Try it in a mirror first to calibrate the right amount.
Use the rear camera for selfies
The rear camera on any modern smartphone is significantly higher quality than the front-facing camera and introduces less distortion at close range. For self-portraits, set a timer and use the rear camera positioned at the right height and distance rather than relying on the front camera. The difference in image quality and flattering accuracy is noticeable.
Posing: The Basics That Make a Difference
You do not need to be a model to pose well for photos. The basics of posing are simple and apply equally whether you are in a professional shoot or a casual snap with friends.
- Posture first, always. Roll your shoulders back and down, stand tall, and engage your core slightly. Good posture transforms a photo before anything else changes. It creates a longer, more confident silhouette and affects how every other posing choice reads. Practise it until it feels natural because slouching in photos is one of the hardest things to correct after the fact.
- Create separation between your arms and body. Arms pressed flat against the sides of the body create a wider appearance and remove definition from the waist. Create a small gap by putting a hand on your hip, holding something, or angling the arm slightly away from the body. Even a centimetre of separation makes a visible difference.
- Shift your weight to one leg. Standing with weight evenly distributed on both legs creates a static, formal appearance. Shifting your weight to one leg introduces a natural, relaxed quality and creates a slight S-curve through the body that is more visually interesting and flattering in most contexts.
- Hands are harder than they look. Hands look awkward when they are left to hang with no purpose. Give them something to do: one hand in a pocket, both loosely clasped, holding something, or one resting lightly on a surface. Avoid clenched fists, hands flat against thighs, or arms crossed tightly.
- For group photos, position yourself thoughtfully. Standing at the end of a group rather than the middle creates a wider appearance. Being slightly behind others rather than at the front of the group also produces a more flattering relative size. These are small choices that make a consistent difference.
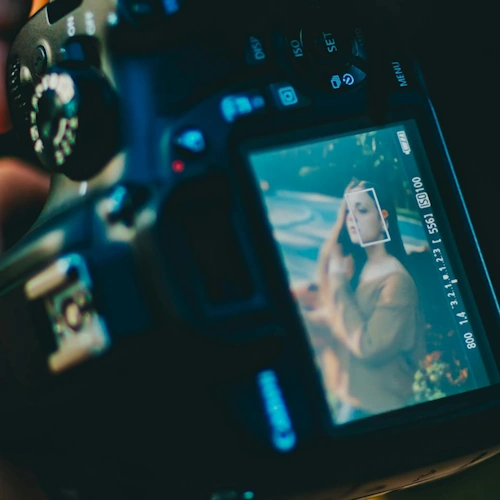
Try it with NeonSnap
See your best self before the photo is taken
NeonSnap's free AI Glow Up tool shows you an enhanced, polished version of any photo. Upload a shot you already have and see what it looks like at its best, useful for understanding the direction to aim for before your next shoot.
Try AI Glow Up free →Expression: The Hardest Part to Get Right
You can have perfect lighting, a flattering angle, and a great pose, and still look stiff and uncomfortable in a photo because of your expression. Getting expression right is the most difficult element for most people and the one that makes the biggest difference to whether a photo feels alive or not.
Stop performing a smile
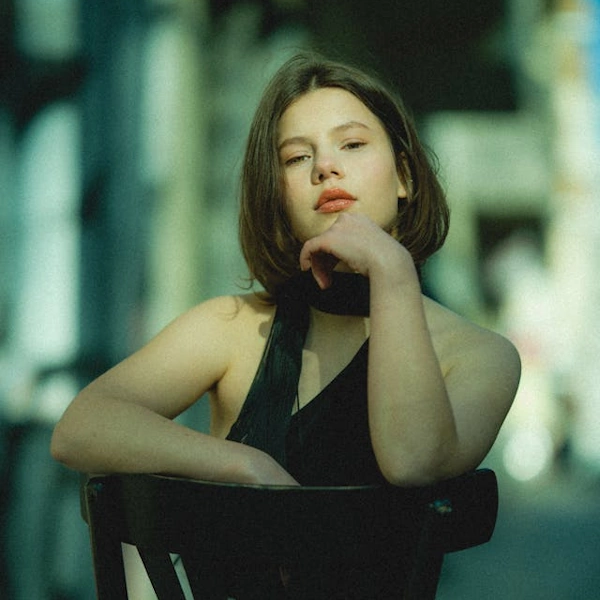
The biggest expression mistake is producing a deliberate, held smile for the camera. Performed smiles involve only the mouth and look exactly like what they are: a face doing what it thinks a smile should look like. A genuine smile involves the eyes, creates small creases at the corners, and changes the whole face rather than just the mouth. To produce something closer to genuine on demand: think of something that genuinely makes you happy in the moment before the shot, or look away from the camera and back just before it fires.
Try a slight smile rather than a full one
A closed-mouth slight smile, or a very subtle open smile, often reads as more natural and confident than a full-teeth smile, particularly in professional or formal contexts. Experiment with both. Many people find a slight smile significantly easier to sustain naturally than a full one, which means it holds its authenticity through multiple shots rather than collapsing into a performance.
Relax your jaw and tongue position
Tension in the jaw is visible in photos and creates a strained quality around the mouth and lower face. Before a shot, consciously relax your jaw by letting it drop slightly and placing your tongue lightly on the roof of your mouth behind your front teeth. This relaxes the jaw, slightly opens the lips, and creates a more natural resting expression. It sounds strange but the difference in photos is noticeable.
Keep taking shots
Professional photographers take hundreds of frames to get a handful of usable images. The difference between the best and worst expression in a burst of twenty photos is usually significant. Burst mode on smartphones, or simply taking many individual shots across a few minutes of movement and natural interaction, gives you the material to find the frames where your expression is genuinely natural rather than performed.
What to Wear for Photos
Clothing choices have a significant impact on how you read in a photo. A few principles that apply regardless of context or style:
- Solid colours over patterns. Patterns, particularly small or busy ones, create visual noise that competes with your face and can produce an optical effect on camera that looks nothing like it did in person. Solid colours keep the focus where it belongs and photograph cleanly.
- Choose colours that suit your skin tone. Colours that wash you out in person will do the same in a photo, often more obviously. Colours that make your complexion look vibrant and healthy will do the same on camera. If you know which colours suit you, wear them. If you are not sure, warm neutrals are a safe choice for most people.
- Consider the background. If you know where a photo is being taken, think about whether your clothing will contrast appropriately with the background. A white outfit against a white wall, or a dark outfit against a dark background, loses definition and makes you visually merge with your environment.
- Fit matters as much as style. Well-fitted clothing photographs better than expensive clothing that fits poorly. Pulling, gaping, or billowing fabric reads clearly on camera and distracts from everything else. If you are planning for a specific photo occasion, check fit carefully beforehand.
- Avoid very shiny fabrics in bright light. Highly reflective fabrics can create hotspots under bright lighting that are distracting and difficult to edit out. Matte or semi-matte fabrics are more reliably flattering across different lighting conditions.
Preparing Your Appearance
How you look going into a photo session matters as much as what you do during it. A few things worth considering beforehand:
- Skin preparation. Hydrated, well-moisturised skin photographs significantly better than dry skin. Apply moisturiser and, for daytime photos, SPF. If you use makeup, a dewy or satin finish foundation photographs more naturally than a very matte one, which can look flat and chalky under certain lighting conditions.
- Hair. Make sure your hair is styled as you want it to appear rather than leaving it for afterwards. Hair that is out of place or that does not suit the context of the photo is one of the hardest things to fix after the fact. If you are unsure which style suits you best for a particular occasion, NeonSnap's AI Hair Change tool lets you try different options on your own photo before committing.
- Rest and hydration. Fatigue shows clearly in photos, particularly around the eyes. If you have an important photo occasion, prioritising sleep beforehand makes a visible difference. Similarly, being well-hydrated improves skin appearance in a way that no product can fully compensate for.
- Glasses and reflections. If you wear glasses, be aware that direct flash or strong frontal lighting will create reflections on the lenses that obscure your eyes. Tilt your head very slightly downward, or angle your glasses slightly, to redirect the reflection away from the camera lens.
lightbulb
For professional photos specifically, the clean girl aesthetic principles map almost perfectly onto what makes a great headshot: glowing skin, minimal and natural-looking makeup, neat hair, and neutral clothing. Our clean girl aesthetic guide covers all of this in detail and is worth reading before any professional shoot.
How to Fix Photos After They Are Taken
Even with good preparation, things go wrong in photos. Eyes close at the wrong moment. Backgrounds are cluttered. The light was not quite right. AI tools have made a significant range of post-photo fixes genuinely easy and accessible without any editing skill.
Fix closed eyes
One of the most frustrating photo problems: a great shot ruined by someone blinking. NeonSnap's free AI Open Eyes tool fixes closed or partially closed eyes in photos, producing a natural open-eyed result that preserves everything else in the image. It is the fastest solution to what used to be an unfixable problem.
Replace a distracting background
A cluttered, inappropriate, or simply uninteresting background undermines an otherwise great photo. NeonSnap's free AI Background Change tool removes and replaces any background instantly, without the need for a green screen or any editing skill. Choose a clean neutral background for professional use, or any setting you prefer for personal photos.
Enhance overall photo quality
If a photo is slightly blurry, low resolution, or simply lacks the sharpness and clarity you wanted, NeonSnap's free AI Upscale tool improves resolution and overall image quality significantly. Particularly useful for older photos or those taken in lower light conditions.
Apply an AI glow up
For a more comprehensive enhancement, NeonSnap's free AI Glow Up tool improves skin quality, lighting, and overall appearance in any photo. The result is a polished, enhanced version of the original that looks like you on your best day rather than a heavily filtered or edited image.
Also on NeonSnap
Try a new look before your next photo session
Wondering how a new hairstyle or colour would look before your next shoot? NeonSnap's free AI Hair Change tool lets you visualise any style on your own photo before booking an appointment or making any changes.
Try AI Hair Change free →For Professional Headshots Specifically
Professional headshots for LinkedIn, company websites, and speaker profiles have their own specific requirements that are worth addressing separately. The general principles above all apply, but a few additional considerations are relevant:
- The background should be neutral and non-distracting. A plain wall, a soft out-of-focus environment, or a clean office setting all work well. Avoid anything that competes with your face for attention.
- Clothing should be professional and appropriate for your industry. Solid colours in navy, white, charcoal, or warm neutrals photograph well and suit most professional contexts. Check our dedicated guide to getting a professional headshot without a photographer for the full breakdown.
- Expression for professional headshots should be confident and approachable. A slight smile rather than a full one works well for most industries. Looking directly at the camera creates a sense of direct engagement that is appropriate for professional contexts.
- AI headshot generation is a genuinely viable option. NeonSnap's free AI LinkedIn Headshot tool transforms any photo into a professional portrait with clean lighting, a neutral background, and a polished finish. For anyone who needs a professional headshot quickly or without the budget for a photographer, it is the most practical solution available.
Frequently Asked Questions
Why do I look bad in photos?
Most people look worse in photos than in real life for a combination of reasons: unflattering lighting, an awkward angle, a caught expression, or the difference between how a camera lens sees you versus how the human eye does. All of these are fixable once you understand what causes them.
What is the most important thing for looking good in photos?
Lighting is the single most important variable. Soft, even, indirect light from a large source flatters almost everyone. Harsh directional light, backlighting, and overhead lighting are the most common causes of unflattering photos regardless of how good everything else is.
What angle is most flattering for photos?
The camera should be at eye level or very slightly above. Shooting from below is unflattering for almost everyone. A slight turn of the body rather than facing the camera square-on creates a more flattering silhouette. Pushing your chin slightly forward and down elongates the neck and defines the jawline.
How do I look more natural in photos?
Forced smiles are the enemy of natural-looking photos. Think of something that genuinely makes you smile just before the shot, or try a slight smile rather than a full one. Moving between shots, looking slightly away and back, and taking many frames all produce more natural results than holding a single posed expression.
How can AI help me look better in photos?
NeonSnap offers several free AI tools for improving photos after they are taken. The Glow Up tool enhances skin and overall appearance, the Open Eyes tool fixes closed eyes in otherwise great photos, the Background Change tool replaces distracting backgrounds, and the Upscale tool improves photo resolution and quality.
Does posture affect how you look in photos?
Significantly. Upright posture with relaxed shoulders creates a taller, more confident silhouette. Rolling your shoulders back and down, engaging your core slightly, and standing tall before a photo is taken makes a visible difference to how you appear in the final image.
Make every photo your best one, free.
NeonSnap's free AI tools fix closed eyes, replace backgrounds, enhance photo quality, and show you your best self. No editing skill needed.
Try AI Glow Up free